HyperV
HyperV Virtual Sensor With Switch Mirror Port
This scenario is for configuring mirroring to be performed at the network switch level.
-
Download the Virtual Hard Disk (VHD):
Obtain the VHD file from the link provided by TD Technical Support. Additionally, download the configuration file attached to the support email. -
Create two Hyper-V virtual switches:
- Select "Virtual Switch Manager..." from the Hyper-V Manager right navigation bar.
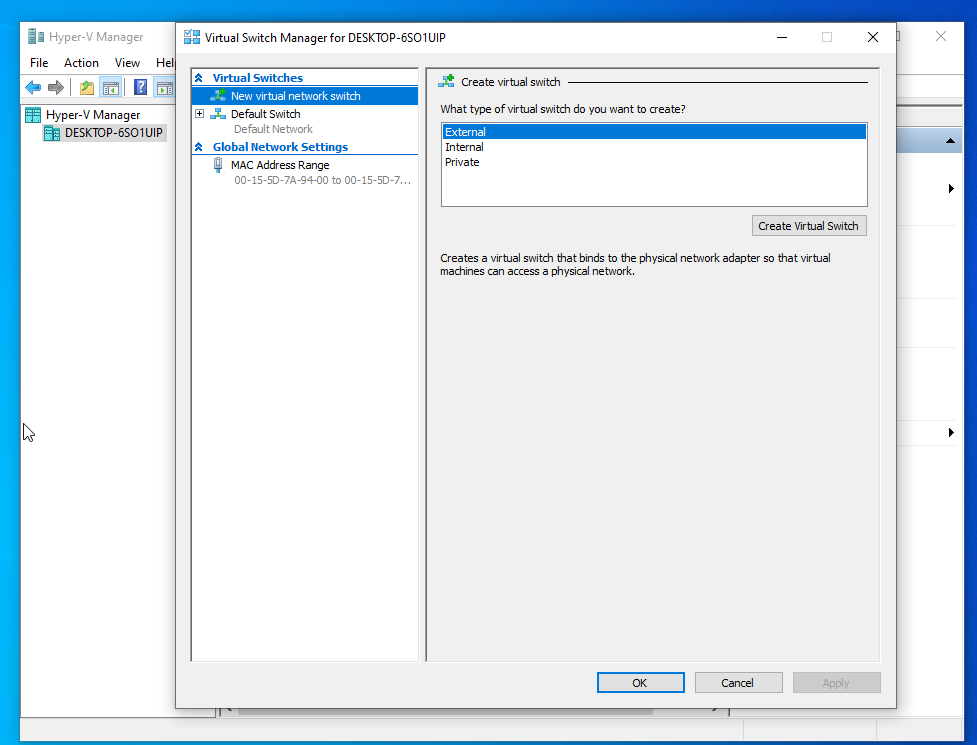
- Select "New virtual network switch" and create two new external switches connected each to one corresponding physical network interface.
- One for the Management network.
- One for the SPAN/Mirror port.
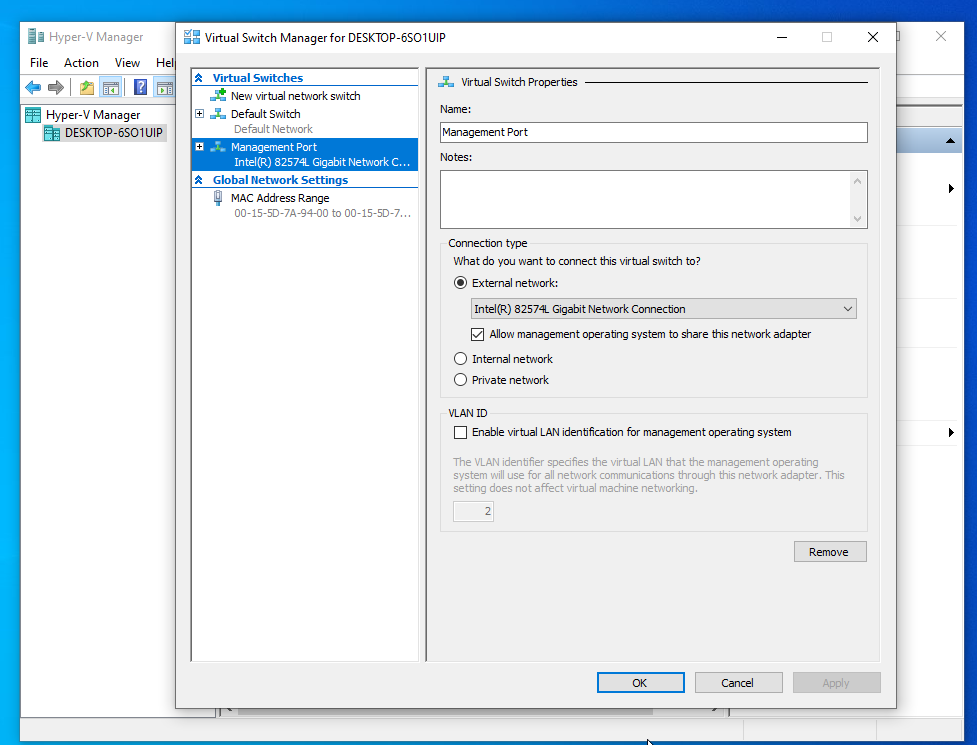
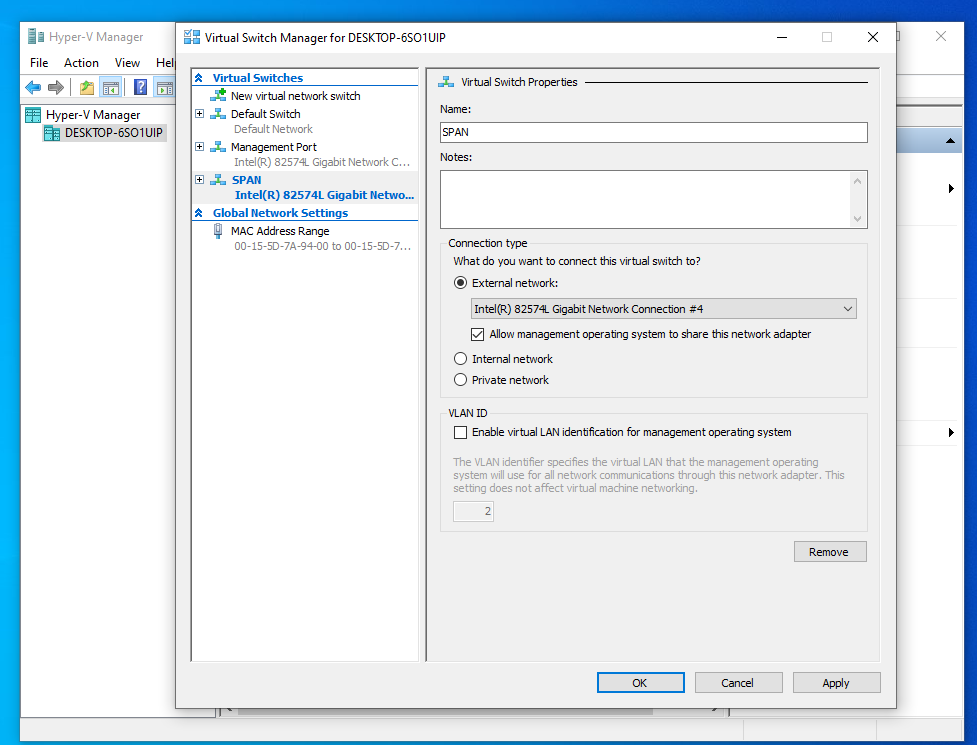
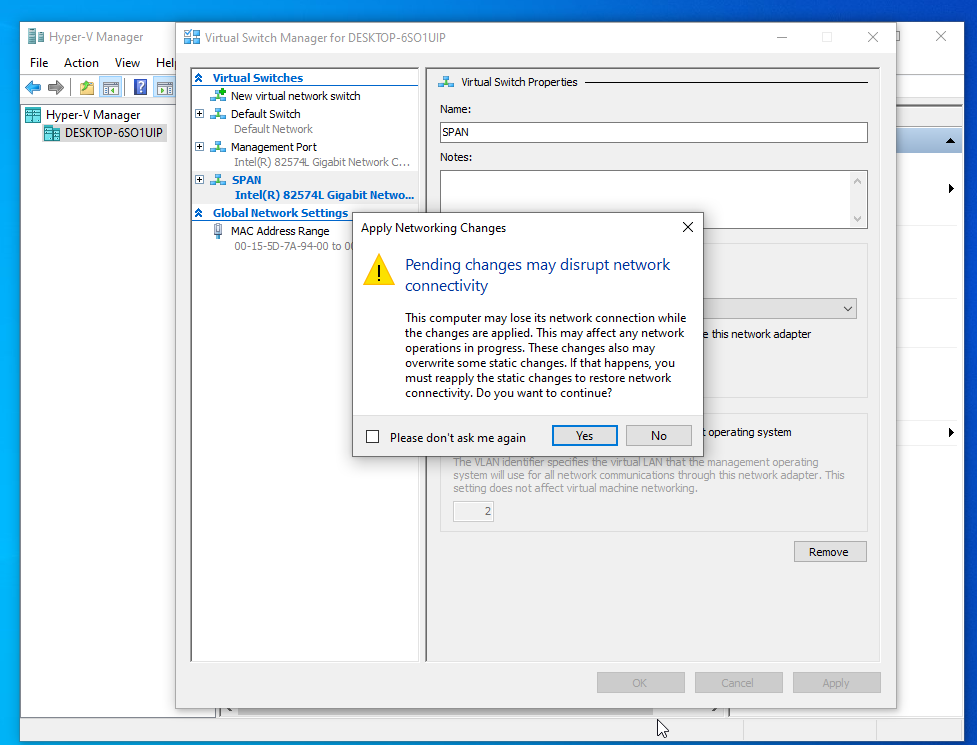
- Apply Networking Changes may result in loss of network connectivity. Please ensure you have an out-of-band remote management solution (or physical access) to manually recover from any unexpected networking loss.
- Select "Virtual Switch Manager..." from the Hyper-V Manager right navigation bar.
-
Hyper-V Virtual Machine Setup:
- Initialize a Generation 1 Virtual Machine (VM) within Hyper-V.
- Allocate 8 GB of RAM and 4 CPU cores to this VM.
- Utilize the Management network created in the previous step.
- Configure the VM to use the downloaded VHD as its existing disk.
Network Interface Configuration: Equip the new VM with a second Network Interface Card and attach it to the SPAN switch created in the previous steps.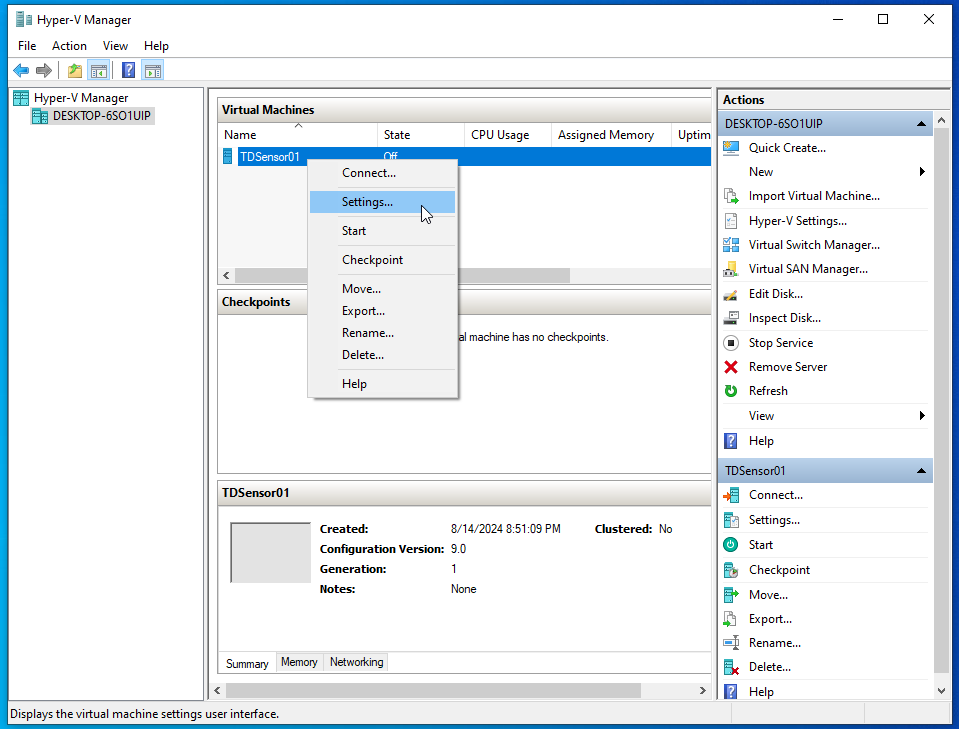
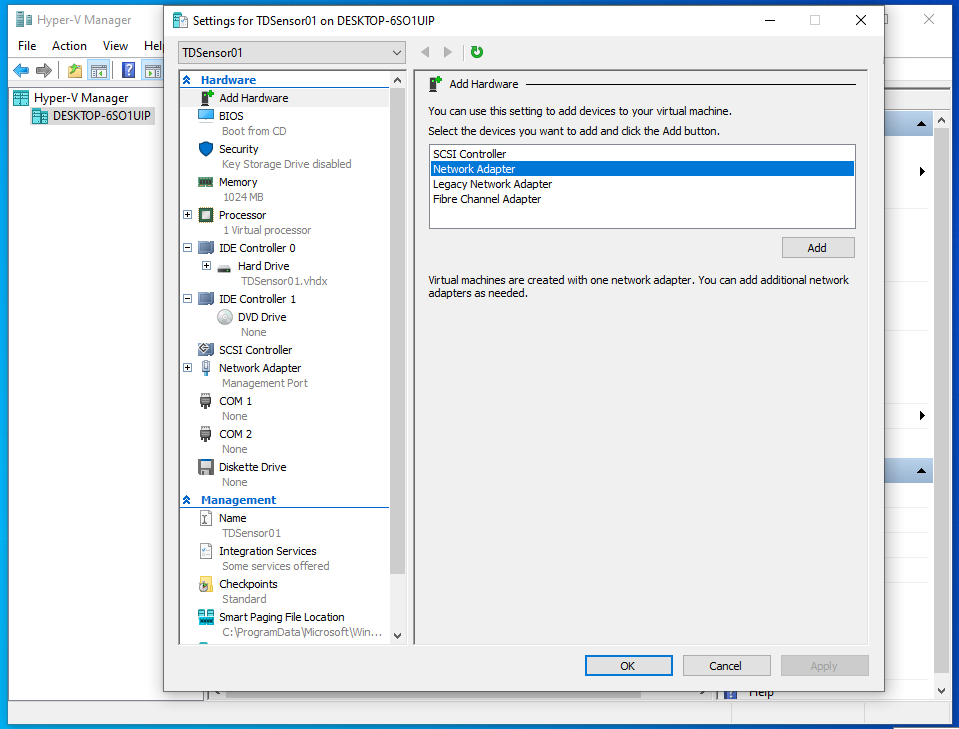
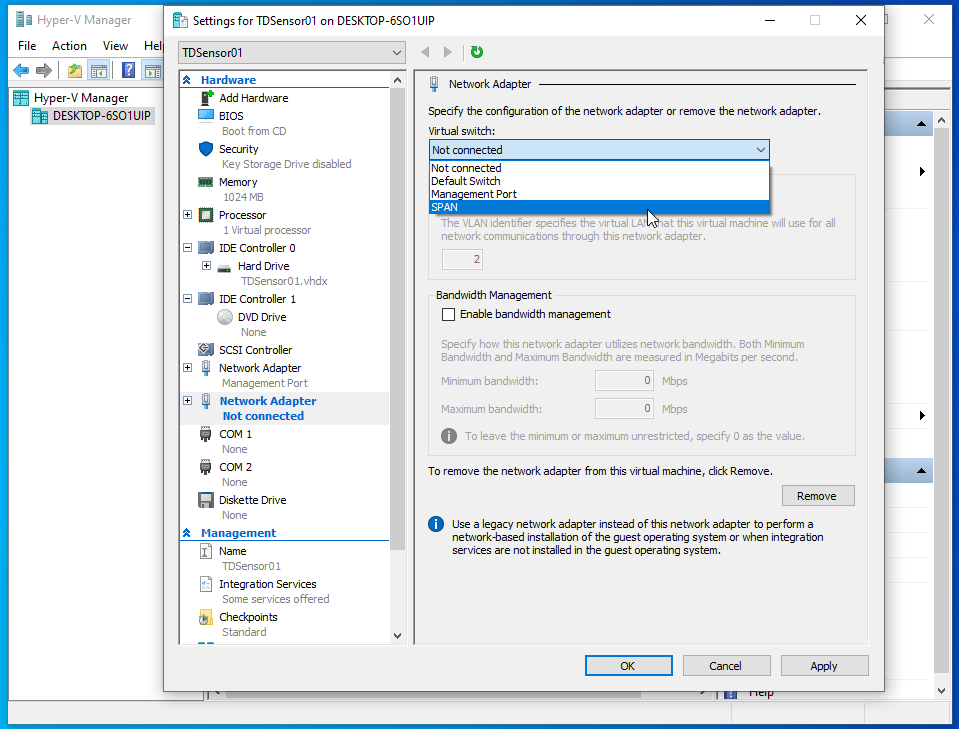
Mirror/SPAN Port Setup: On your network switch, create a mirror (also known as SPAN) port targeting the internal firewall port. This setup should reflect the deployment diagram provided by TD.
Enable Monitoring Mode with PowerShell:
- Enable promiscuous mode on this virtual switch via the Security settings, ensuring it can accept mirrored traffic.
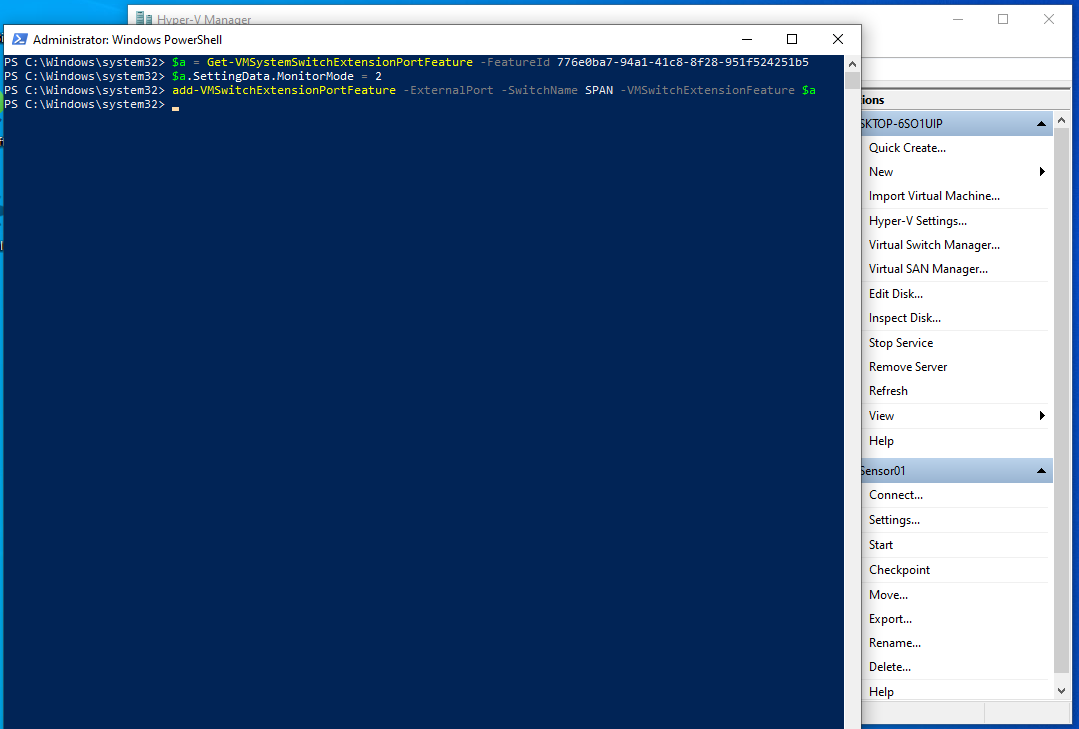
Execute the following PowerShell commands (as admin) in order to activate monitoring mode on the virtual switch connected to the mirror port:
$a = Get-VMSystemSwitchExtensionPortFeature -FeatureId 776e0ba7-94a1-41c8-8f28-951f524251b5
$a.SettingData.MonitorMode = 2
add-VMSwitchExtensionPortFeature -ExternalPort -SwitchName <Name_of_Virtual_Switch> -VMSwitchExtensionFeature $a
-
Initial Configuration and Access:
Access the VM via its console using the credentials provided by TD Technical Support. During the initial setup, you will be prompted to select between a static IP or DHCP configuration. Choose the option that best fits your network environment. -
Web Interface Configuration:
After the VM restarts, navigate to its web interface athttps:<VM_IP>//:5000. Upload the previously downloaded configuration file (from Step:1) to complete the setup. -
Finalize Installation:
Inform TD Technical Support once the setup is fully operational.
HyperV Virtual Sensor With Host-Level Advanced Features Mirroring
This scenario is for configuring mirroring to be performed directly on the hypervisor host machine, instead of an upstream network switch.
-
Access Virtual Machine Settings:
In the Hyper-V Manager console, select the VM you want to configure for port mirroring. Right-click the VM and choose Settings.
-
Configure Port Mirroring:
In the Settings window, expand the Network Adapter node under the selected VM. Click on the Advanced Features section. In the Port mirroring section, choose one of the following options:
- None: Disables port mirroring (default setting).
- Source: Configures the network adapter as the source of mirrored traffic. The traffic sent and received by this network adapter will be copied to the destination network adapter.
- Destination: Configures the network adapter as the destination for mirrored traffic. It will receive copies of traffic from the source network adapter.
-
Apply and Exit:
After selecting the desired port mirroring setting, click Apply and then OK to save the changes. Repeat these steps for any other VMs involved in the port mirroring configuration.