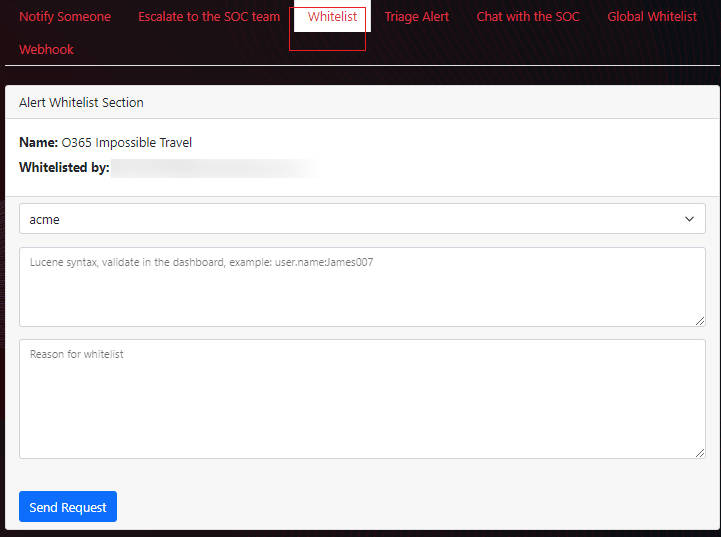
How to Do Whitelisting
Whitelisting alerts is crucial for minimizing noise in alert systems, particularly monitoring and security applications. By implementing a whitelist, users can effectively reduce the occurrence of false positives—alerts that are mistakenly flagged by the system despite not representing actual issues. Adjusting the severity of confirmed non-threatening alerts to zero before the alert is triggered ensures streamlining the alert management process and conserving valuable resources.
Accessing the Whitelist Feature
-
Navigate to the Interaction Section: Look for the "Interaction" button within the main user interface. This button is your gateway to various interactive features, including the Whitelist.
-
Enter the Whitelist Interface: You will have multiple options upon clicking the "Interaction" button. From here, select the Whitelist feature to access its functionalities.


How to Whitelist
-
Pick a Useful Field :Before using the whitelist feature, you need to select the correct Field. Then fill in the blanks with these Fields as Syntax (Please refer to the example video at the bottom).
-
Including a Reason for Whitelisting: Always add a 'Reason for whitelist' with your entries. This practice is not only a best practice for clarity but also facilitates easier tracking and management of whitelist entries in the future.
-
Pre-Submission Check: Before submitting your whitelist request, we strongly recommend testing your Lucene query in the "Security Detections" interface. This step is crucial for identifying and rectifying any errors in your query, ensuring it operates as intended without issues.
Whitelist Entry Sample for O365 Impossible Travel
When you encounter a "O365 Impossible Travel" alert that you believe is a false positive or represents expected behavior, you can create a whitelist entry to prevent unnecessary alerts. Below is a step-by-step example of how to do this:
Syntax for Whitelisting
To whitelist an alert for network scanning software detected on a specific computer operated by a particular user from the specific IPs, use the following Lucene syntax format:
user.name:"Ethan Harrison" AND source.ip:(221.221.112.112 OR 199.199.123.123)
This query specifies that the alert should be ignored (whitelisted) when it originates from the IPs (221.221.112.112 OR 199.199.123.123) and the user "Ethan Harrison" is logged in or is the source of the detected activity.
Example of Pre-Submission Check
Before submitting your whitelist request, return to the "Security Detections" interface. to test your query. This step is critical to identifying and correcting any errors in your query, ensuring that the query runs as expected without issues.

Reason for Whitelist
It's helpful to document the reason behind each whitelist entry. For this example, the rationale could be: "In the system operated by the user 'Ethan Harrison', from ip 221.221.112.112 OR 199.199.123.123, the login is considered expected behavior."